What could be more tranquil than an underwater world? Murals that create the impression of being under the sea or beneath the surface of a lake or river can be perfect for a peaceful bedroom, a rustic beach cottage or a child’s room. The water theme also goes well in bathrooms and can complement outdoor areas, for example, around a swimming pool. Here are some ideas and tips to stimulate your imagination.
Inspirations
You can choose amongst a variety of styles if you want to create an underwater mural. Children’s rooms invite particular visual treatments whereas adult living areas demand a more subtle and sophisticated look.
For kids’ murals you could think of ‘Pirates of the Caribbean’, sunken treasure and mermaids, executed in cartoon-style. Whimsy isn’t only for kids though and you could exercise your sense of humor in an underwater mural in a bathroom or swimming pool area.
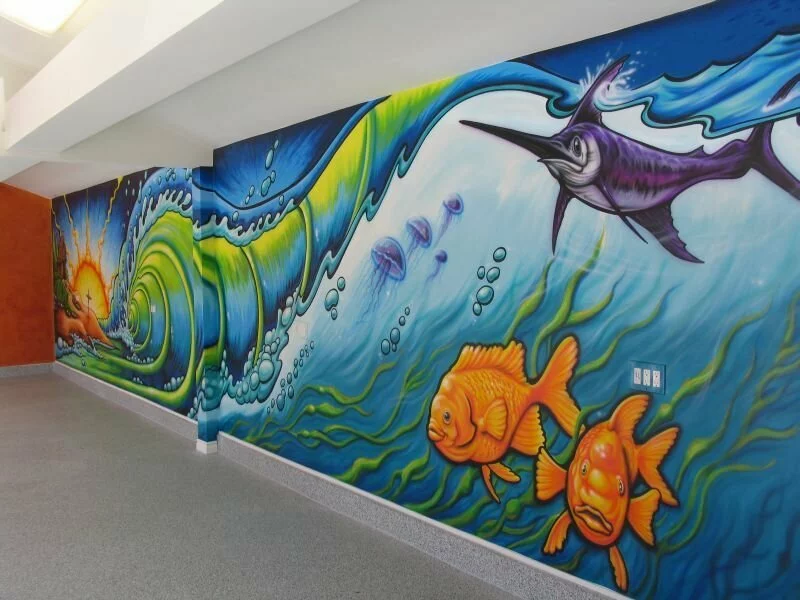
For a bedroom or living room, you might want your underwater mural to evoke that feeling of peace and relaxation we get from gazing into an aquarium. If you want intense color then bright corals, vivid tropical fish and other exotic creatures are a good choice.
Alternatively, a mural featuring a pale seabed with pastel seashells can create a subtle and relaxing atmosphere. Color is the key to atmosphere and you can experiment with different schemes. Consider greens and even soft browns as an alternative to blue as your keynote color.
For maximum impact your mural can cover an entire wall, or you could paint a faux picture window. This popular technique, , is known as ‘trompe l’oeil’, which means ‘deceiving the eye’. In children’s rooms, faux portholes can create the impression of being in a submarine deep beneath the sea. Portholes through which frolicking mermaids can be seen are effective in a girl’s room.
Painting Your Underwater Scene
Whichever design you choose you will be able to find a stencil to suit your needs. Reusable stencils, or transfers that allow you to mark a design on to the wall ready for painting, can make life much easier for those who lack confidence in their artistic skills.
You may want to create a mural from a picture or photo in your possession. The technique for scaling up a picture to mural size involves marking both into corresponding squares and copying your picture onto your wall one square at a time – or check out the computer software that is specially designed to do this for you.
Start your painting by covering your space with the background color, using a sponge, brush or for big areas, a roller. You may have two background areas, such as the seabed and the water above it, in different colors that meet at a ‘horizon’. Then you will outline your fish, rocks and other images, before finishing off with shading, texture and fine detail.
Remember that murals in some areas require extra measures, including the use of waterproof paint for murals in bathrooms or paint with a built-in sunscreen for outdoor artwork. A transparent glaze will protect your mural and ensure that it lasts as long as possible.

